Privacy for you Internet access plus a monitor for your devices, a Wi-Fi/LAN intruder detector and a VPN Server for remote access with a Raspberry Pi + bonus track: password manager. Now with containers!!
Changelog
- 20230103 – Added Netdata as a monitoring solution recommended instead RPi-monitor
- 20240210 – Updated for Debian 12 (Bookworm), including instructions for container installation. Corrected some misconfigurations.
Note about the changes:
I’m excited to announce the latest update to my comprehensive guide, “Building a Privacy Box with a Raspberry Pi,” now titled “Enhanced Privacy Box with Raspberry Pi: Revamped and Containerized”. This revised edition addresses and corrects previously inaccuracies, expands on explanations to ensure clarity, and introduces an innovative approach to privacy technology by incorporating containerization. By leveraging containers instead of traditional applications, users gain flexibility, efficiency, and enhanced security for their Internet access, device monitoring, Wi-Fi/LAN intrusion detection, and VPN server functionalities. Whether you’re a novice or an experienced Raspberry Pi enthusiast, this guide is your go-to resource for constructing a robust privacy box tailored to the modern digital landscape.
Enhanced Privacy Box with Raspberry Pi: Revamped and Containerized © 2024 by Daniel Alomar is licensed under CC BY-NC-SA 4.0. To view a copy of this license, visit http://creativecommons.org/licenses/by-nc-sa/4.0/
You can download a PDF of this article here: EnhancedPrivacyBox
Introduction
Background
In these uncertain and peculiar times that seem to be stretching on indefinitely, it’s crucial that we safeguard our privacy. The adage “if you’re not paying for it, then you are the product”1,2 holds true.
We weren’t educated in school on the use of Information and Communication Technologies (ICT). Most of us aren’t digital natives, and even those who are find that technology evolves faster than our ability to adapt to it. Those fortunate enough to have an affinity for technology and to be early adopters may find it ‘somewhat less difficult’ to navigate ICT, almost like an intuition. However, this doesn’t mean we’re safe from the dangers of exposing our lives on the Internet. Various companies are constantly on the lookout to collect our data to create the most accurate profile possible, detailing our tastes, preferences, and habits. They know us much better than we know ourselves, and that’s not a cliché, it’s reality.
This data is collected by companies known as Data Brokers3 using various techniques. The data is used to create profiles of us for different purposes, such as marketing and advertising, risk mitigation, and people-search services4,5. While personalized advertisements might sound appealing to some, it’s important to be aware of the side effects, such as differential pricing and other more severe consequences. Companies, armed with extensive information about us, can calculate prices for the services or products we want to acquire or the advertisements we see with high accuracy. For instance, the price for health insurance won’t be the same if the company has information about us acquired from Data Brokers. The same applies to the advertisements we see on our devices. Here’s an example from Signal: https://signal.org/blog/the-instagram-ads-you-will-never-see/ .
It’s common to hear someone say, “I don’t care about privacy concerns. I have nothing to hide.” A quick response you could give, with a smile on your face, is, “If you have nothing to hide, then you can give me your email password.” Of course, they won’t, which proves that EVERYONE has some information to protect.
What is a Privacy Box
The Privacy Box, as I call it, is a device designed to enhance your Internet privacy. It comes equipped with various tools that are pre-installed and configured. One of these tools is the Pi-hole application, which blocks advertisements across your entire network for all types of devices, eliminating the need to install software on each individual device.
Another tool is Unbound, a local validating, recursive, and caching DNS resolver. This means that your Internet Service Providers (ISP) won’t be able to see what you’re searching for, as the Domain Name Resolution will be local and even faster, within your Raspberry Pi.
In addition to these tools, WireGuard, a VPN Server, is also included. This allows for a secure, remote connection to your network, ensuring continued privacy when you’re outside your local network.
All these functionalities are installed inside a Raspberry Pi device, allowing it to run 24×7 at a low cost.

The main features of the Privacy Box include:
- Blocking unwanted content on all connected devices without the need for client-side software (Pi-hole)
- Providing network-wide protection (Pi-hole)
- Improving network performance (Pi-hole)
- A secure open-source recursive DNS server for local resolution (Unbound)
- A network intrusion detector (Pi.Alert)
- Device monitoring (RPI-Monitor)
- Secure and remote access through a VPN (WireGuard)
As an added bonus, I’ve included a tutorial on setting up a Raspberry Pi to host a password manager and how to access it from the Internet. I’ve chosen Vaultwarden, which is based on the well-known solution, Bitwarden. Due to technical reasons, it’s easier to run this server on another Raspberry Pi. You could try to set it up on the same device where you have Pi-hole, but I wouldn’t recommend it.
If you lack the technological knowledge to follow this guide and build this Privacy Box yourself, ask a friend with more tech knowledge (perhaps a geek) to help you set it up. We techies love to help others. My intention has been to create a very simple tutorial, with step-by-step instructions, explaining the reason for each step so that we can understand what we’re doing.
Before we begin, I would like to express my gratitude to Mr.Smashy (@THESMASHY)), who authored a guide6 that served as the original source of inspiration for this one. His contributions to this field are greatly appreciated. Now, let’s get started! 😊
Note: Commands are identified using a different text style and are framed within a grey box like this:
$ls -l
The command will start with either a $ or # symbol. This indicates whether the command is executed without administrator privileges ($ symbol) or with administrator privileges (# symbol). To elevate privileges (from $ to #), we must run the sudo -s command or start the command with sudo. In both cases, you will need the administrator password. Here are some examples:
$sudo -s
#
Running the ls command with elevated privileges:
$sudo ls
Objective
The aim is to provide instructions for installing a set of utilities within a Raspberry Pi to create a Privacy Box that ensures our privacy while browsing the Internet. This includes how to install the WireGuard VPN, which allows us to connect remotely to our network. We will also demonstrate how to set up Vaultwarden, an alternative implementation of the Bitwarden password manager. This tool will be installed on a separate Raspberry Pi device.
Requirements
Here is the list of requirements:
- Raspberry Pi 3 Model B (or higher)
- A computer to write the image and connect to the Raspberry Pi for configuration
- SD Card, USB memory stick, or SSD HD (capacity: 16 GB or higher)
- Internet connection
- Basic knowledge of computers or a tech-savvy friend
- Basic knowledge of the Linux editor nano
- Power supply
- Curiosity
- Time
Note 1: Regarding the computer, I have used my laptop with GNU/Linux (EndevourOS flavor) to write the image and connect to the Raspberry Pi, so the commands you will see belong to the GNU/Linux operating system. The remaining instructions are independent of the operating system you use. If you are a Windows or Mac user, you will find several alternatives easily on the Internet to write the image to the SD Card or USB stick and connect to the Raspberry Pi.
Note 2: Whether to choose an SD Card, USB memory stick, or SSD HD? People say the lifetime of an SD Card is shorter than a USB memory stick or SSD HD, so many people boot from an SD Card and use a USB memory stick or an SSD hard drive to run the operating system. From Raspberry Pi 3 and up, the operating system can be booted and run directly from the USB. In this manual, I have added some tools to decrease the write cycles to the disk using RAM memory. Which one to choose? I would recommend using an SSD HD.
Important: MAKE REGULAR BACKUPS to ensure you have a plan B for any incident related to the device.
Setup of the Privacy Box
This section will explain how to set up Pi-hole and Unbound, along with other optional and recommended tools.
Why I chose Debian instead of Raspbian or RaspberryPi OS
There are several reasons why I chose a Debian image instead of Raspbian or RaspberryPi OS. The main reason is freedom. Debian is a full GNU/Linux flavor, with no commercial or proprietary software.
A second reason is the incident related to the internal repository files modification without notification that Raspbian did in February 20217,8,9. A Microsoft repository pointing to a Microsoft server was added secretly without any notification. The reason was to provide Visual Studio Code for some scenarios. This modification without consent crossed the boundaries of my trust and made me decide to move to a full open-source distribution like Debian. If they changed this without notification, what could they do next time?
Identifying the device
To identify your Raspberry Pi model, you can use a command that queries the device directly. This is particularly useful if you’re unsure about the model even after visually inspecting it.
You can run the following command in the terminal:
$cat /proc/device-tree/model
This command will return the Raspberry Pi Model. It’s a straightforward and reliable way to confirm the specific model of your Raspberry Pi.
![]()
If you have installed Raspbian as your operating system, you can use the following command to check your Raspberry Pi model. This command will return information about your device:
$rev=$(awk '/^Revision/ { print $3 }' /proc/cpuinfo) && curl -L perturb.org/rpi?rev=$rev
This command first retrieves the revision number of your Raspberry Pi from the CPU info, and then uses curl to send a request to perturb.org with the revision number as a parameter. The website will return the model information based on the revision number.

Download and Flash an Image
You can download the Debian image for Raspberry Pi from https://raspi.debian.net/. For a production environment, I recommend using a tested image from the daily build available here: https://raspi.debian.net/daily-images/
Choose the xz-compressed image that corresponds to your hardware.

Once you’ve downloaded the file, locate it and open a console session in that folder. You can decompress the downloaded image using the following unxz command:
$unxz raspi_3_bookworm.img.xz
This will result in an img file. In my case, it’s raspi_3_bookworm.img.
Next, plug an SD card or USB into your laptop and flash the image to the device with the following command (replace sdb with the identifier for your SD Card or USB):
$sudo dd bs=4M if=raspi_3_bookworm.img of=/dev/sdb conv=fdatasync status=progress
If you choose to boot and run the operating system from the USB, you’ll need to configure the device to boot from USB. You can find the settings for booting from USB on the Raspberry Pi website.
Please note that if you have a Raspberry Pi 2 version 1.1 or lower, you can only boot from SD, but then you can switch to the USB.
Configuring remote access with SSH
The secure way to connect to your Raspberry Pi is through an SSH connection. This can be done in two ways:
- Using a login and password: This method allows anyone who knows the username and password to connect to the device from any location.
- Using an SSH key: This method is more secure. Your public key is stored on the remote machine and a private key is stored on your machine. Both SSH keys are required to establish a secure connection.
I recommend setting up the second method.
Enable SSH on Raspberry Pi in Headless Mode Without Keys
First, we need to enable the SSH connection, which is disabled by default for security reasons. Here are the steps:
- Turn off the device and remove the card or USB.
- Insert the microSD card into the card reader or plug the USB into the computer.
- Create an empty file inside the boot partition called SSH.
Pre-configuration and Enabling SSH Remote Connection Using SSH Key
We are going to generate SSH keys on our computer and copy the public key into sysconf.txt (raspifirm partition). Use the following command to generate the keys:
$ssh-keygen -t rsa

Next, edit sysconf.txt, uncomment the root_authorized_key entry, and paste the public key generated in the previous step (located in the id_rsa.pub file). You can also modify the hostname of the Raspberry Pi (I have chosen ‘Anuk’).

Configuring a static IP address
To set a static IP address, navigate to the RASPIROOT partition and modify the eth0 file located at the following path: /etc/network/interfaces.d/eth0. Set the IP address of your choice and the IP of the corresponding router gateway. In my case, these are 192.168.1.10 and 192.168.1.1, respectively. The file should look like:
auto eth0
iface eth0 inet static
        address 192.168.1.10
        netmask 255.255.255.0
        gateway 192.168.1.1
Configuring DNS
We will set the DNS to Cloudflare (either 1.1.1.1 or 1.0.0.1). Create the file /etc/resolv.conf with the chosen DNS:
nameserver 1.0.0.1
After setting up the DNS, put the SD Card or USB stick back into the Raspberry Pi and boot it. Now, you can try to connect to the Raspberry Pi from your computer using the username root and the IP address you set.
$ssh root@192.168.1.10

Additional configurations
Setting the Hostname
Set the hostname by editing the file /etc/hostname:
#nano /etc/hostname
Add a hostname entry to the hosts file (in my case, ‘Anuk’):
#nano /etc/hosts
![]()
If you’re using Raspbian, you can set the hostname through the raspi-config application.
Updating the System
Update the system to get the latest updates:
#apt update && apt-get upgrade -y
Install some additional software that we will need:
#apt install sudo dnsutils gnupg wget curl git
Adding a Non-Root User
Add a non-root user and set a password for it:
#adduser daniel

Add the user to the sudo and video groups:
#adduser daniel video
#adduser daniel sudo
Note: If you’re using Raspbian OS, the default user is ‘pi’. I recommend creating another user and removing the default one once you’ve created the new one with the following commands:
$sudo pkill -u pi
$sudo deluser --remove-home pi
Lock Down the SSH Service
Edit the SSH config file. We recommend using the SSH keys generated previously and disabling password access:
$sudo nano /etc/ssh/sshd_config
Uncomment the lines in white

and copy-paste the public key we generated previously:
$mkdir -p ~/.ssh
$nano ~/.ssh/authorized_keys
![]()
Save changes and exit the editor. Restart SSH:
$sudo service ssh restart
Restart the service. We’re going to be disconnected in case we were connected through SSH:
$sudo service networking restart
If you’ve previously assigned this IP address, you’ll get a message.

Just delete the entry in your known hosts database:
$nano ~/.ssh/known_hosts
Logout as root and login as the new user (in my case, ‘daniel’):
$ssh daniel@192.168.1.10
Check the IP configuration (static IP and DNS configuration).

Setting the Time Zone
Set our time zone. We can check all the time zones listed with the command:
$timedatectl list-timezones
Choose the one that fits you best. In my case, I chose ‘Europe/Madrid’:
$sudo timedatectl set-timezone Europe/Madrid
Once set, you can retrieve the status with the following command:
$timedatectl status
We’re going to set the time automatically, using the NTP protocol which helps us to change and synchronize the date and time periodically:
$sudo nano /etc/systemd/timesyncd.conf
Set NTP to ‘time.cloudflare.com’ and uncomment the FallbackNTP and PollIntervalMaxSec lines.
Installing Unattended Upgrades Package (Recommended)
To have unattended upgrades, we need to install an additional package:
$sudo apt install unattended-upgrades
The configuration of unattended upgrades is set inside this file:
$sudo nano /etc/apt/apt.conf.d/50unattended-upgrades
You may want to update some settings. I recommend uncommenting and changing ‘Unattended-Upgrade::Remove-Unused-Dependencies’ to ‘true’. Exit and save the file.
Basically, we commented out the type of upgrade we want to apply. The second last line allows the system to email us the status. We must install mailutils or mailx first in Raspbian for the email notification to be effective. The last line allows the system to reboot automatically. Please also make sure that update-notifier-common has been installed.
There are more options that we can set such as reboot time and log file in the configuration file. Uncomment any option when necessary.
Create a periodic upgrade file with the following command:
$sudo nano /etc/apt/apt.conf.d/02periodic
And add the following content:
// Control parameters for cron jobs by /etc/cron.daily/apt-compat //

// Enable the update/upgrade script (0=disable)
APT::Periodic::Enable "1";

// Do "apt-get update" automatically every n-days (0=disable)
APT::Periodic::Update-Package-Lists "1";

// Do "apt-get upgrade --download-only" every n-days (0=disable)
APT::Periodic::Download-Upgradeable-Packages "1";

// Run the "unattended-upgrade" security upgrade script
// every n-days (0=disabled)
// Requires the package "unattended-upgrades" and will write
// a log in /var/log/unattended-upgrades
APT::Periodic::Unattended-Upgrade "1";

// Do "apt-get autoclean" every n-days (0=disable)
APT::Periodic::AutocleanInterval "7";

// Send report mail to root
//     0:  no report             (or null string)
//     1:  progress report       (actually any string)
//     2:  + command outputs     (remove -qq, remove 2>/dev/null, add -d)
//     3:  + trace on
APT::Periodic::Verbose "2";
Check your unattended upgrades by running this command to debug your configuration:
$sudo unattended-upgrades -d

Installing Fail2Ban (Optional)
Fail2Ban is an intrusion prevention software designed to protect against brute-force attacks. First, we need to install the package:
$sudo apt install fail2ban -y
Fail2Ban will block an attacker’s IP if they fail to log in after 5 attempts for 10 minutes.
Note: Fail2Ban installed from the repository will only provide security on the IPv4 protocol. If you want Fail2Ban to support IPv6, please refer to the relevant guide.
The configuration of Fail2Ban is set in the following file: /etc/fail2ban/jail.conf. If you make any config changes, restart the service via:
$sudo service fail2ban restart
In order to recover access, use:
$ssh -o PreferredAuthentications=password -o PubkeyAuthentication=no user@your.vps.ip
Installing a Firewall (Optional)
It is recommended to install a firewall to block unsolicited connections. Uncomplicated Firewall (ufw) is a program for managing a netfilter firewall designed to be easy to use. It uses a command-line interface consisting of a small number of simple commands and uses iptables for configuration. To install ufw, just run this command:
$sudo apt install ufw
Configuring the Firewall
Create your access list to the ports you need:
$sudo ufw allow 80
$sudo ufw allow 443
$sudo ufw allow 53
$sudo ufw allow 8888
$sudo ufw allow 22/tcp
You can be even more restrictive with extended parameters on the rules, like SSH for example. You can only allow access on port 22 from your computer’s IP address:
$sudo ufw allow from 192.168.1.120 to any port 22/tcp
Enabling the Firewall
$sudo ufw enable
To show rules once the firewall is enabled, run the following command:
$sudo ufw enable
To show rules once the firewall is enabled, run the following command:
$sudo ufw status
Status: active
To                         Action      From
--                         ------      ----
80                         ALLOW       Anywhere
443                        ALLOW       Anywhere
53                         ALLOW       Anywhere
8888                       ALLOW       Anywhere
22                         ALLOW       Anywhere
5335                       ALLOW       Anywhere
51900/udp                  ALLOW       Anywhere
80 (v6)                    ALLOW       Anywhere (v6)
443 (v6)                   ALLOW       Anywhere (v6)
53 (v6)                    ALLOW       Anywhere (v6)
8888 (v6)                  ALLOW       Anywhere (v6)
22 (v6)                    ALLOW       Anywhere (v6)
5335 (v6)                  ALLOW       Anywhere (v6)
Installing Log2Ram to Expand SSD Life (Recommended)
SSD Disks, SD Cards, and USB sticks have an SSD inside, which has a lifespan determined mainly by the write cycles (times we write something to the disk). To reduce the times we write to the SSD memory, we can redirect the writing of the system logs to RAM memory using Log2Ram. To do this, we have to install the Log2Ram application.
First, we need to force a log reduction before starting to use Log2Ram:
$sudo journalctl --vacuum-size=16M
Let’s add the repository where we are going to install the application and its key. Please check the Debian flavor you are using (bookworm in my case):
$echo "deb http://packages.azlux.fr/debian/ bookworm main" | sudo tee /etc/apt/sources.list.d/azlux.list
wget -qO - https://azlux.fr/repo.gpg.key | sudo apt-key add -
Let’s update the system database and install the application:
$sudo apt-get update
$sudo apt install log2ram -y
Once installed, we need a reboot:
$sudo reboot
Configuring Log2Ram
We need to configure Log2Ram to increase the size:
$sudo nano /etc/log2ram.conf
Increase the SIZE parameter to 128MB, disable the mail notification, and increase the LOG_DISK_SIZE to 200M. Exit and save.

Restart Log2Ram:
$sudo service log2ram restart
And check that Log2Ram is running:
$df -h

How to solve apt-key deprecation warning
In case you get the following deprecation warning when adding the Log2Ram repository:

W: http://packages.azlux.fr/debian/dists/bookworm/InRelease: Key is stored in legacy trusted.gpg keyring (/etc/apt/trusted.gpg), see the DEPRECATION section in apt-key(8) for details
You can fix it by following these steps:
1.- Retrieve the list of the repositories. You need the last 8 digits of the public key of the repository you want to trust. In our case, it’s the first entry (0312D8E6).

2.- Create a new file adding the key:
sudo apt-key export 0312D8E6 | sudo gpg --dearmour -o /etc/apt/trusted.gpg.d/log2ram.gpg
Now, you should no longer see the warning message.

Installing and configuring Pi-hole
Now that the system is configured and secured, we can install Pi-hole. It can be installed as a native application (bare metal) or using Docker containers. I previously chose bare metal, but recently I moved to the container world. Here are some advantages and disadvantages of running Pi-hole in a container rather than as a native application:
Advantages
- Portability: You can easily move your Pi-hole configuration to another device or system by using docker volumes or backups (you can have a second pi-hole instance in another raspberry pi or running in a NAS).
- Isolation: You can run Pi-hole in a separate environment from your host system, which can improve security and prevent conflicts with other applications.
- Flexibility: You can customize your Pi-hole installation by using different docker images. You can also use docker-compose to manage multiple containers and services.
Disadvantages
- Overhead: You have to install and run docker on your host system, which can consume some resources and add some complexity.
- Compatibility: You may encounter some issues with Pi-hole features that rely on the host network, such as DHCP or DNSSEC. You may also need to adjust some settings or ports to make Pi-hole work properly with docker.
- Updates: You have to manually update your Pi-hole container when a new version is released, or use a script or a cron job to do it automatically. You also have to keep track of the changes in the docker image and the Pi-hole configuration.
Here there are instructions for both ways:
Bare metal installation
The installation process is very simple. Just download this script from the Pi-hole site and execute it to start the installation with the following command:
$sudo curl -sSL https://install.pi-hole.net | bash

After some checks, you’ll be greeted with the install screen

Remember to give a donation to the project if you find it useful. (I did it)


I recommend selecting all the third-party lists listed. We can add additional sources later.

Choose the protocols you have in your network.

Confirm the static IP chosen previously

Ensure you have an IP reservation for your Raspberry Pi.

I will recommend to install the web interface

Let the log enable


When the installation is complete, you will get a final screen with some important info.

Save this information to access to the Pi-hole server:
Save this information to access the Pi-hole server. Save the admin webpage password in your password manager for now; it should be changed later. This same info is displayed once you return to the shell. Note the command to change the web admin password (pihole -a -p)

Containers installation
First, we need to install the Docker engine. To manage containers easily, I will also install Portainer.
Installing using the apt repository
Before you install Docker Engine for the first time on a new host machine, you need to set up the Docker apt repository. Afterward, you can install and update Docker from the repository.
Set up Docker’s apt repository. First, we have to add Docker’s official GPG key:
$sudo apt-get update
$sudo apt-get install ca-certificates curl gnupg
$sudo install -m 0755 -d /etc/apt/keyrings
$curl -fsSL https://download.docker.com/linux/debian/gpg | sudo gpg --dearmor -o /etc/apt/keyrings/docker.gpg
$sudo chmod a+r /etc/apt/keyrings/docker.gpg
Next, add the repository to our apt sources:
$echo \
  "deb [arch=$(dpkg --print-architecture) signed-by=/etc/apt/keyrings/docker.gpg] https://download.docker.com/linux/debian \
  $(. /etc/os-release && echo "$VERSION_CODENAME") stable" | \
  sudo tee /etc/apt/sources.list.d/docker.list > /dev/null
$sudo apt-get update
Installing the Docker packages
We are ready to install the docker packages
1.- To install the latest version, run:
$sudo apt-get install docker-ce docker-ce-cli containerd.io docker-buildx-plugin docker-compose-plugin
2.- Verify that the installation is successful by running the hello-world image:
$sudo docker run hello-world
This command downloads a test image and runs it in a container. When the container runs, it prints a confirmation message and exits.
You have now successfully installed and started Docker Engine.
Installing the portainer images
To install portainer, we have to run this command:
$sudo docker run -d -p 9000:9000 --name=portainer --restart=always -v /var/run/docker.sock:/var/run/docker.sock -v portainer_data:/data portainer/portainer-ce:latest
Pointing to browser to our IP address at port 9000 (http://192.168.1.10:9000/#!/home in my case), portainer will be ask to set an admin password
Installing pi-hole container
To install pi-hole using portainer, just follow this steps
1. Add a new container from Containers menu

2. Name your container and use the image “pihole/pihole:latest”.

3. Publishing ports is only needed if we set the network to bridge. If we set the network to host, there is no need to publish ports, as the container has full access to all network interfaces of the host. If we set the network to bridge, we configure it to publish 5 network ports (53 TCP and UDP, 80 and 443 TCP). If we want to use Pi-hole as a DHCP Server, we should also publish port 67 UDP.

4. We need to create two volumes to map on our host. Ensure you have created this path on your host (raspberry pi). I have created the folder DockerVol
- /etc/dnsmasq.d to /home/daniel/DockerVol/pihole/etc-dnsmasq.d
- /etc/pihole to /home/daniel/DockerVol/pihole/etc-pihole

5. To facilitate the use of unbound, network should be host and we can set the hostname

6. Inside environment variables we set the timezone and webpassword

7. Set the restart policy to ‘unless stopped’.
![]()
8. Deploy the container

Portainer start to download the container and deploy it.


Note about network configuration
When you set the network configuration of a Docker container to host, the container uses the Docker host’s network stack directly. In this mode, the container has full access to all network interfaces of the host, and the ports opened by the container are directly accessible on the host’s IP address.
Therefore, when using host network mode, there’s no need to publish ports using the -p or –publish flag. This is because the container’s ports are already directly exposed to the host, and hence, to the outside world.
However, please note that the host mode gives the container full access to local system services and is therefore considered insecure. It’s recommended to use it judiciously and understand the security implications.
Adjusting Pi-hole settings
To modify the privacy settings of the Pi-hole application, the following file needs to be edited:
$sudo nano /etc/pihole/pihole-FTL.conf
If you’re using containers, the file is located at:
$sudo nano ~/DockerVol/etc-pihole/pihole-FTL.conf
Configure the privacy level and the duration for storing queries in the database according to your preferences. In my setup, I’ve selected a privacy level of 0 and set the database to store queries for 30 days.
Here’s how you can set these parameters:
# Which privacy level is used?. More info: https://docs.pi-hole.net/ftldns/privacylevels/
PRIVACYLEVEL=0
# How long should queries be stored in the database? Setting this to 0 disables the database. Default 365
MAXDBDAYS=30
Updating Pi-hole Regularly
Pi-hole frequently receives updates for its components, including Pi-hole core, FTL, and the Web Interface. The update process varies depending on whether Pi-hole is running as a standalone application or inside a container.
Updating the standalone application manually
To update Pi-hole as a standalone application, execute the following command:
$pihole -up
Updating via Portainer
- Navigate to ‘Containers’, then stop the container you wish to update.
- Select the container, and look for the ‘Recreate’ button. This will preserve the data mapped to a volume while recreating the container.
- Choose ‘Pull latest image’, then ‘Recreate’.
- After recreation, start the container. It should now be running with the latest version.
- The container is now updated to the newest release!
Please be patient as the update process may take some time. Consider removing old container images to save space.
Automating the Update Process
Important: The Pi-hole team advises against automating Pi-hole updates. It’s crucial to read release notes as some updates may require additional changes beyond simply updating the image.
Updating standalone Pi-hole via Cron
To automatically update Pi-hole every Sunday, use a cron job. However, be cautious with automated updates; if a major change occurs that you’re not ready for, disable the cron job by running sudo crontab -e and commenting out the update line (add a ‘#’ at the beginning of the line).
To set up the cron job:
$sudo crontab -e
Add the following line to update every Sunday at 2:30 AM:
30 2 * * SUN pihole -up
Updating Container Using Watchtower
Warning (From Pi-hole GitHub Site): Many users employ Watchtower for updating Pi-hole containers. However, it’s advised not to automatically update your Pi-hole container, especially unattended. While updates are generally safe, unexpected issues can occur.
To manually update:
- Read the release notes thoroughly.
- Pull the new image.
- Stop and remove the current Pi-hole container. Ensure any important data (logs, customizations) is volume-mapped, or it will be lost.
- Recreate the container with the new image.
Remember, Pi-hole is a critical part of your network. Avoid unattended updates that could cause issues during off-hours.
Setup Unbound
Boosting Pi-hole security
With Pi-hole operational, it’s currently set for minimal blocking and defaults to forwarding lookups to Google DNS. While you can switch to another upstream DNS provider, it essentially boils down to whom you trust with your DNS queries. But what if you prefer not to rely on external providers like Cloudflare DNS? That’s where Unbound comes into play. By installing Unbound, you enable your system to independently resolve DNS queries using root servers, utilizing a recursive approach.
Why Unbound? Unbound allows you to resolve DNS names directly through root servers in a recursive manner. For a detailed explanation, visit Pi-hole’s Unbound Guide. The primary advantage here is enhanced security; you don’t have to depend on an upstream provider for DNS traffic. The trade-off is the initial lookup performance, which can be slower as it involves traversing multiple servers. However, both Pi-hole and Unbound support caching configurations, which significantly improve performance for subsequent lookups.
Installing Unbound
To install Unbound, run:
$sudo apt install unbound -y
Setting Up Root Hints Manually
If you’re not installing Unbound from a repository and have downloaded the list of primary root servers manually, use this command. Note: This step is only necessary if you’re not using the default dns-root-data package, which Unbound can locate automatically.
$wget https://www.internic.net/domain/named.root -qO- | sudo tee /var/lib/unbound/root.hints
Configuring Unbound for Pi-hole
Create a new configuration file for Unbound:
$sudo nano /etc/unbound/unbound.conf.d/pi-hole.conf
In this file, paste the following configuration. This differs from the one in Pi-hole’s documentation, as it includes caching settings to enhance performance.
server:
    # If no logfile is specified, syslog is used
    # logfile: "/var/log/unbound/unbound.log"
    verbosity: 0

interface: 127.0.0.1
    port: 5335
    do-ip4: yes
    do-udp: yes
    do-tcp: yes

# May be set to yes if you have IPv6 connectivity
    do-ip6: no

# You want to leave this to no unless you have *native* IPv6. With 6to4 and
    # Terredo tunnels your web browser should favor IPv4 for the same reasons
    prefer-ip6: no

# Use this only when you downloaded the list of primary root servers!
    # If you use the default dns-root-data package, unbound will find it automatically
    #root-hints: "/var/lib/unbound/root.hints"

# Trust glue only if it is within the server's authority
    harden-glue: yes

# Require DNSSEC data for trust-anchored zones, if such data is absent, the zone becomes BOGUS
    harden-dnssec-stripped: yes

# Don't use Capitalization randomization as it known to cause DNSSEC issues sometimes
    # see https://discourse.pi-hole.net/t/unbound-stubby-or-dnscrypt-proxy/9378 for further details
    use-caps-for-id: no

# Reduce EDNS reassembly buffer size.
    # Suggested by the unbound man page to reduce fragmentation reassembly problems
    edns-buffer-size: 1472

# Perform prefetching of close to expired message cache entries
    # This only applies to domains that have been frequently queried
    # This refreshes expiring cache entries if they have been accessed with
    # less than 10% of their TTL remaining
    prefetch: yes

    # This attempts to reduce latency by serving the outdated record before
    # updating it instead of the other way around. Alternative is to increase
    # cache-min-ttl to e.g. 3600.
    cache-min-ttl: 0
    serve-expired: yes
    # I had best success leaving this next entry unset.
    # serve-expired-ttl: 3600 # 0 or not set means unlimited (I think)

    # Use about 2x more for rrset cache, total memory use is about 2-2.5x
    # total cache size. Current setting is way overkill for a small network.
    # Judging from my used cache size you can get away with 8/16 and still
    # have lots of room, but I've got the ram and I'm not using it on anything else.
    # Default is 4m/4m
    msg-cache-size: 128m
    rrset-cache-size: 256m

# One thread should be sufficient, can be increased on beefy machines. In reality for most users running on small networks or on a single machine, it should be unnecessary to seek performance enhancement by increasing num-threads above 1.
    num-threads: 1

# Ensure kernel buffer is large enough to not lose messages in traffic spikes
    so-rcvbuf: 1m

# Ensure privacy of local IP ranges
    private-address: 192.168.0.0/16
    private-address: 169.254.0.0/16
    private-address: 172.16.0.0/12
    private-address: 10.0.0.0/8
    private-address: fd00::/8
    private-address: fe80::/10

# To get unbound stats (sudo unbound-control stats_noreset)
remote-control:
    control-enable: yes
Verifying the Unbound Configuration
To ensure that your Unbound configuration is correctly set up and free of errors, you can use the unbound-checkconf tool. This tool scans the Unbound configuration file for any syntax errors or misconfigurations. Run the following command in your terminal:
$sudo unbound-checkconf
This command will provide feedback on your Unbound configuration. If there are no issues, it typically returns a message indicating that the configuration is okay. If it finds any problems, it will display the relevant error messages, which you can use to troubleshoot and correct your configuration.
![]()
Final step: restarting unbound
After configuring Unbound, it’s essential to restart the service for the changes to take effect. Execute the following command:
$sudo service unbound restart
Testing unbound
To verify that Unbound is functioning correctly and to measure its response time, use the dig command. For example, to query the domain coneixement.info, use:
$dig www.coneixement.info @127.0.0.1 -p 5335

This command tests the response time of Unbound. You’ll likely notice a significant reduction in response time on subsequent tests, thanks to caching.

Keeping Unbound Updated
Setting up a cron job to keep Unbound’s root hints file updated is a good practice. To do this. Open the crontab editor:
$sudo crontab -e
At the end of the file, add the following line:
01 02 03 */4 * wget -N -q -O /var/lib/unbound/root.hints https://www.internic.net/domain/named.root
Save and exit the editor.
The cron job is scheduled to run at 02:01 AM on the 3rd day of every 4th month. This frequency is usually sufficient for updating the root hints file. The -N option ensures the file is only downloaded if it’s newer than the existing one, -q keeps the operation quiet, and -O specifies the path where the file should be stored.
This setup ensures your Unbound service remains up-to-date without cluttering your logs with unnecessary output.
Configuring Pi-hole to Use Unbound
Access Pi-hole Admin Interface, open your web browser and visit the Pi-hole admin page at http://pi.hole/admin. Log in using the password you set during the Pi-hole installation. Adjust DNS Settings. once logged in, navigate to the ‘Settings’ section and click on the ‘DNS’ tab. In the DNS settings, uncheck any pre-selected DNS servers.
- Check the box next to ‘Custom 1 (IPv4)’.
- Enter 127.0.0.1#5335 in the corresponding field. This directs Pi-hole to use Unbound, running on the same device, on port 5335.
Save Your Changes. Click the ‘Save’ button at the bottom of the page to apply your new DNS settings.

Note on performance: Initially, you might notice slower performance during the first few queries. This is normal as both Pi-hole and Unbound are building their cache.

With time, the response time will significantly improve due to the caching mechanisms in place in both Pi-hole and Unbound.

Viewing Statistics in the Pi-hole Web Interface
Once you log in to the Pi-hole web interface, you’ll begin to see various statistics displayed. These statistics provide valuable insights into your network’s DNS traffic.

Observing the Increase in Blocked Queries:
- As time progresses, you can monitor the increase in the number of queries that Pi-hole blocks. This is a key metric in understanding the effectiveness of Pi-hole in filtering unwanted content and ads.
- The web interface will display real-time updates, showing how many queries were made, how many were blocked, and what percentage of total traffic this represents.
- The visual graphs and charts in the dashboard offer an easy-to-understand overview of these statistics, highlighting trends and patterns in your network’s DNS queries.
By regularly checking these statistics, you gain a better understanding of your network’s behavior and the impact of Pi-hole in enhancing your online privacy and security.

Enhancing filtering with Pi-hole: blocklists, blacklists, adlists, and whitelists
To optimize your Pi-hole setup, it’s crucial to first identify the types of content you wish to block. This can range from advertising and telemetry to parental controls, NSFW content, malware domains, and more. Here’s a guide to effectively expanding your filtering capabilities:
Understanding default blocklists: Pi-hole includes a default blocklist, which is optional and can be chosen during installation. This list is regularly maintained and updated, providing a solid foundation for basic filtering.
Adding additional blocklists: For more specific needs, explore external blocklist collections. A prominent resource is Firebog (The Big Blocklist Collection), which categorizes lists into:
- Suspicious
- Advertising
- Tracking & Telemetry
- Malicious
- Other
You can choose one to three lists from each category relevant to your filtering objectives.
Before adding new lists: Visit the Firebog page and carefully read the descriptions and notes for each list. This will help you understand the focus and potential impact of each list on your network traffic.
How to add new lists: Once logged into the Pi-hole web interface, navigate to the ‘Adlists’ section. Here, you can add new blocklists by pasting their URLs.
By tailoring your blocklists, you can significantly enhance the effectiveness of Pi-hole in managing your network’s content. Remember, the key is to strike a balance between robust filtering and maintaining access to legitimate content. Over-blocking can be just as problematic as under-blocking, so choose your lists judiciously.

Successful addition: When a new list is successfully added to Pi-hole, you’ll see a confirmation message indicating successful inclusion.

Duplicate lists: If you attempt to add a list that’s already present, Pi-hole will ignore it and display a warning message to avoid duplication.

Updating the internal database
After adding all desired lists, it’s crucial to update Pi-hole’s internal database to apply the new blocklists. This can be done in two ways:
- Command Line: Run pihole -g in the terminal.
- Web Interface: Click the ‘Update Gravity’ button located in the web interface.

The update process might take some time. During this period, do not navigate away from or close the page.

Wait for a success message to confirm the completion of the update.

It’s important to remember that adding too many lists can lead to false positives. This excessive filtering might make some internet services inaccessible, unreachable, or not fully functional. To avoid such issues, some domains may need to be whitelisted.
Whitelisting and blacklisting domains
Manage domains effectively by adding them to the Blacklist or Whitelist under the ‘Domains’ menu in the web interface.

For example, if you encounter issues with Gmail icons not appearing, you might need to whitelist the domain gstaticadssl.l.google.com.
Removing existing blocklists
To remove an existing blocklist, execute the following command:
$sudo sqlite3 /etc/pihole/gravity.db "DELETE FROM adlist"
Backing up Pi-hole configuration
After configuring Pi-hole, it’s wise to create a backup. This can be done through the web interface, which generates a file that can be imported to the same or a different Pi-hole setup, saving time on configuration.

Additional functionalities of Pi-hole
Pi-hole offers several other functionalities, including but not limited to:
- Transforming Pi-hole into your DHCP service provider.
- Managing clients and groups.
- Disabling blocking temporarily.
- Using the Query Log to review and manage the blacklist and whitelist, allowing easy addition or removal of domains.
Installing WireGuard
Overview
WireGuard is a lightweight, secure, and fast VPN server designed to facilitate remote and secure access. As a communication protocol and free, open-source software, WireGuard focuses on ease of use, high-speed performance, and a minimal attack surface. Compared to other VPN servers like IPsec and OpenVPN, it aims to deliver superior performance and efficiency (Source: Wikipedia).
Configuration and Installation
Debian 12:
WireGuard is available in the Debian 12 repositories. Install necessary packages:
$sudo apt install software-properties-common python3-launchpadlib
$sudo apt-get install wireguard wireguard-tools linux-headers-$(uname -r) qrencode
Debian 11:
Raspbian, by default, does not trust the Debian package repository. To resolve this, add Debian’s public keys to the trusted set:
$sudo apt-key adv --keyserver http://p80.pool.sks-keyservers.net:80 --recv-keys 04EE7237B7D453EC 648ACFD622F3D138
Add the Debian unstable repository:
$sudo sh -c "echo 'deb http://deb.debian.org/debian/ unstable main' >> /etc/apt/sources.list.d/unstable.list"
To prevent conflicts with normal Raspbian packages, limit the use of the Debian distribution:
$sudo sh -c "printf 'Package: *\nPin: release a=unstable\nPin-Priority: 90\n' >> /etc/apt/preferences.d/limit-unstable"
Import additional Debian keys:
$wget -O - https://ftp-master.debian.org/keys/archive-key-$(lsb_release -sr).asc | sudo apt-key add -
Update the system database and install WireGuard along with necessary packages:
$sudo apt-get update
$sudo apt-get install wireguard wireguard-dkms wireguard-tools linux-headers-$(uname -r) qrencode
Note for Raspbian OS users: Kernel headers are required.
$sudo apt-get install raspberrypi-kernel-headers
Installing a DDNS Service
Purpose
When accessing your network remotely via a VPN (like WireGuard), it’s essential to know your public IP address or have a domain name linked to it. Since most IP addresses are dynamic and can change, and static IP addresses are limited and often costly, a practical solution is to use a DDNS (Dynamic Domain Name System) service. This service provides a free domain that points to your public IP address. A script updates your public IP with the service periodically, ensuring that the domain redirects to the new IP if it changes.
Instructions
- Requirement Check: If you have a static public IP address, this step is not necessary.
- Choosing a DDNS Service: For this guide, we’ll use the DuckDNS DDNS service. DuckDNS offers detailed instructions and scripts for various devices, including the Raspberry Pi.
- Setting Up the Script: We’ll create a cron job to run a script that updates the DDNS. The script, named duck.sh, will be set to execute at 5 minutes past every hour. This frequency is sufficient, as updating every 5 minutes is generally unnecessary.
- Creating the Cron Job: Open the crontab with the command:
$sudo crontab -e
Configure the cron job. Here’s an example of what the crontab entry might look like:


This runs the script at 5 minutes past every hour.
Crontab Scheduling: To explore different scheduling combinations for the cron job, you can use Crontab Guru: https://crontab.guru/.

Setting up and configuring a WireGuard VPN Server
Objective
We will configure WireGuard VPN access for both a phone and a laptop. For enhanced security, we will use a non-default port, opting for port 5900 instead of the standard 5820.
Generating security keys
To secure the connection and restrict access, we need to generate public/private key pairs and preshared keys. Execute the following commands as root:
Switch to root user and navigate to the WireGuard directory:
$sudo su -
#cd /etc/wireguard
#umask 077
Generate keys for the server, phone, and laptop:
#wg genkey | tee server_private_key | wg pubkey > server_public_key
#wg genkey | tee phone_private_key | wg pubkey > phone_public_key
#wg genkey | tee laptop_private_key | wg pubkey > laptop_public_key
Generate preshared keys for additional security:
#wg genpsk < phone_private_key > phone_preshared_key
#wg genpsk < laptop_private_key > laptop_preshared_key
Server configuration
Create the server configuration file wg0.conf:
#nano /etc/wireguard/wg0.conf
Edit the file with the following structure, replacing keys with the ones you generated:
### Server Configuration ###
[Interface]
PrivateKey = <server private key>
Address = 10.6.0.1/24
PostUp = iptables -A FORWARD -i %i -j ACCEPT; iptables -A FORWARD -o %i -j ACCEPT; iptables -t nat -A POSTROUTING -o eth0 -j MASQUERADE
PostDown = iptables -D FORWARD -i %i -j ACCEPT; iptables -D FORWARD -o %i -j ACCEPT; iptables -t nat -D POSTROUTING -o eth0 -j MASQUERADE
ListenPort = 51900

### Phone Configuration ###
[Peer]
PublicKey = <phone public key>
PresharedKey = <phone preshared key>
AllowedIPs = 10.6.0.2/32
# Optional: PersistentKeepalive = 25

### Laptop Configuration ###
[Peer]
PublicKey = <laptop public key>
PresharedKey = <laptop preshared key>
AllowedIPs = 10.6.0.3/32
# Optional: PersistentKeepalive = 25
Editing the server configuration:
If you need to edit the server configuration later, stop the interface first:
#systemctl stop wg-quick@wg0.service
After editing, restart the interface:
#systemctl start wg-quick@wg0.service
Firewall configuration and IP masquerading on the server
Configuring the Firewall
Ensure your server’s firewall allows traffic on the WireGuard port (here, 51900/UDP):
$sudo ufw allow 51900/udp
Edit the UFW default policy:
$sudo nano /etc/default/ufw
Change the default forward policy from “DROP” to “ACCEPT”:
DEFAULT_FORWARD_POLICY="ACCEPT"
Save and close the file.
Identifying network interface:
Determine your server’s main network interface name:
$ip addr
(For this guide, it’s assumed to be eth0.)

Configuring IP masquerading
Edit the UFW configuration file to add IP masquerading rules:
$sudo nano /etc/ufw/before.rules
At the end of the file, add the following lines (replace eth0 with your network interface name if different):
# Start IP Masquerading setup
*nat
:POSTROUTING ACCEPT [0:0]
-A POSTROUTING -o eth0 -j MASQUERADE
COMMIT
# End IP Masquerading setup
Save and close the file.
Important Considerations
- Replace Key Values: Ensure to replace PrivateKey, PublicKey, and PresharedKey in the WireGuard configuration with your generated values.
- Network Interface Type: The configuration assumes a wired ethernet connection (eth0). For WiFi (wlan0), modify PostUp and PostDown commands in the WireGuard configuration to use -o wlan0.
Enabling IP forwarding
Edit sysctl.conf:
#nano /etc/sysctl.conf
Uncomment net.ipv4.ip_forward=1 and save the changes.

Enable the WireGuard interface:
#systemctl enable wg-quick@wg0
![]()
Securing sensitive files
Protect sensitive WireGuard files:
#chown -R root:root /etc/wireguard/
#chmod -R og-rwx /etc/wireguard/*

Reboot the Raspberry Pi:
$sudo reboot
After rebooting, verify the WireGuard interface:
$ip addr

Configuring port forwarding:
Access your router’s settings and set up port forwarding. Forward external port 51900 (UDP) to the internal IP address and port 51900 of the Raspberry Pi. Example:

Setting up WireGuard clients
Common setup for clients
VPN Server Address: Use the domain server created with DuckDNS as vpn_server_address.
Setting up access
Open the configuration file for the phone client:
sudo nano /etc/wireguard/phone.conf
Add the following content, replacing placeholders with actual values:
[Interface]
Address = 10.6.0.2/24
PrivateKey = <insert phone_private_key>
DNS = 10.6.0.1

[Peer]
PublicKey = <insert server_public_key>
PresharedKey = <insert phone_preshared_key>
Endpoint = <vpn_server_address>:51900
AllowedIPs = 0.0.0.0/0, ::/0
Open the configuration file for the laptop client:
$sudo nano /etc/wireguard/laptop.conf
Add similar content as for the phone, replacing placeholders:
[Interface]
Address = 10.6.0.3/24
PrivateKey = <insert laptop_private_key>
DNS = 10.6.0.1

[Peer]
PublicKey = <insert server_public_key>
PresharedKey = <insert laptop_preshared_key>
Endpoint = <vpn_server_address>:51900
AllowedIPs = 0.0.0.0/0, ::/0
Generate QR code for easy import
Use qrencode to create a QR code:
#qrencode -t ansiutf8 < /etc/wireguard/phone.conf

Testing the Connection
After connecting the phone to the local network, test the connection running the command wg:

Attempt to access local resources (e.g., Pi-hole web interface).
Adding Unattended Upgrades (Optional):
For third-party packages (e.g., from PPAs), manually include them for security updates.
Determining PPA Origin and Suite:
Check /var/lib/apt/lists for files ending with InRelease.
Use less to view details:
$less /var/lib/apt/lists/deb.debian.org_debian_dists_unstable_InRelease

Note the Origin and Suite fields to provide to unattended-upgrade for automatic updates.
Installing Pi.Alert, a network security scanner & notification framework (optional)
Pi.Alert is a compact and effective project designed to detect Wi-Fi and LAN intruders by monitoring connected devices and alerting you to any unknown devices. It also notifies you when “always connected” devices are disconnected. Originally developed by pucherot and available at pucherot/Pi.Alert, it has not been updated since 2021. Recognizing its potential, several forks quickly emerged. For this installation, we’ll be using a containerized version by jokob-sk, available at jokob-sk/Pi.Alert, though non-container alternatives like leiweibau/Pi.Alert are also available.
Installation Guide
This guide will cover setting up the container using a configuration file through the stacks menu in Portainer. The configuration will include:
- Healthcheck feature to monitor the container’s health status.
- Volume mapping for:Synchronizing device data between Pi.Alert and Pi.Hole by mapping the Pi-hole folder where the pihole-FTL.db file is stored (optional).Mapping the Pi.Alert log folder for log access (optional).
- Configuring the TimeZone and port.
- Setting the user and group ID.
- Setting the network mode.
Docker Compose Configuration:
version: "3.9"
services:
  pi.alert:
    container_name: Pi.Alert
    healthcheck:
      test: curl -f http://localhost:20211/ || exit 1
      interval: 5m
      timeout: 10s
      retries: 5
    volumes:
      - /home/daniel/DockerVol/pialert/config:/home/pi/pialert/config:rw
      - /home/daniel/DockerVol/pialert/db:/home/pi/pialert/db:rw
      # Optional log volume. Uncomment to enable it
      #- /home/daniel/DockerVol/pialert/log:/home/pi/pialert/front/log:rw
      # Optional Pi-hole synchronization. Uncomment to enable it
      #- /home/daniel/DockerVol/pihole/etc-pihole:/etc/pihole/:rw
    environment:
      TZ: Europe/Madrid # Change to your timezone
      PORT: 20211
      HOST_USER_ID: 1000
      HOST_USER_GID: 1000
    network_mode: host
    restart: unless-stopped
    image: jokobsk/pi.alert:latest
Firewall Configuration:
If you’ve enabled a firewall, remember to open the TCP port and reload the firewall to allow access to the Pi.Alert web interface:
$sudo ufw allow 20211/tcp
$sudo ufw reload
Securing Access:
As the default setup is not password-protected, it’s advisable to change the default password (123456) and enable login protection:
- Navigate to the ‘Set Password’ option within the System menu in settings.
- Enter your desired password in the SETPWD_password field.
- Change SETPWD_RUN from disabled to before_config_save and click the play button. A notification should confirm that the password is set.
- Access the General settings under the Core menu and enable PIALERT_WEB_PROTECTION.
- Finally, click the Pi.Alert icon in the upper right corner and select ‘Sign out’. You will now be prompted for a password upon logging in.
Installing a monitoring tool
When it comes to system monitoring, there are a plethora of options ranging from lightweight applications to more comprehensive solutions that offer extensive functionalities at the expense of higher resource consumption.
Initially, I opted for RPi-Monitor for its simplicity and light footprint, offering all the basic monitoring parameters one might need. However, it became apparent that RPi-Monitor has not been updated since August 2017, prompting a search for a modern, actively maintained alternative. This search led me to discover NetData, a robust, open-source tool designed for real-time metrics collection. NetData excels in presenting metrics such as CPU usage, disk activity, bandwidth utilization, and website traffic through live, intuitive charts. It also allows for the creation of a free cloud account which adds enhanced features like:
- Infrastructure-level dashboards aggregating data from multiple nodes.
- Centralized alert notifications.
- Custom dashboard editor.
- Intelligent troubleshooting assistance to identify root causes of issues.
Although NetData offers premium features, the free account promises to remain free indefinitely.
For those requiring a more powerful monitoring solution with extensive integrations and capabilities, including machine learning, Grafana is an excellent choice. Grafana provides a sandbox environment for experimenting with dashboards and data visualization.
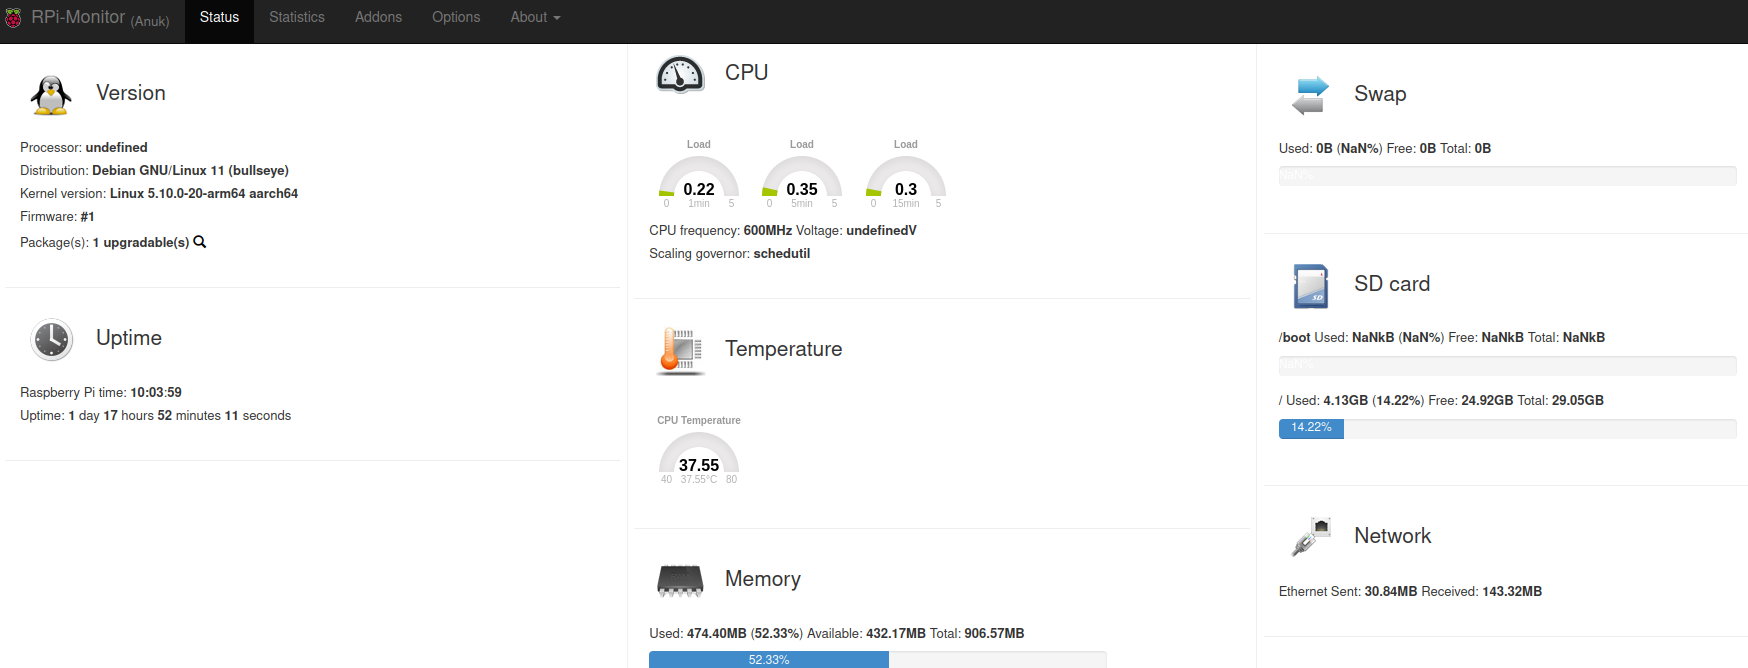
Installing RPi-Monitor (Deprecated)
As RPi-Monitor’s maintenance has ceased, its installation is only recommended for historical reference or specific legacy applications. To install RPi-Monitor, follow these commands:
$sudo apt-get install dirmngr
$sudo apt-key adv --recv-keys --keyserver hkp://keyserver.ubuntu.com:80 2C0D3C0F
$sudo wget http://goo.gl/vewCLL -O /etc/apt/sources.list.d/rpimonitor.list
$sudo apt-get update
$sudo apt-get install rpimonitor
Configuring RPi-Monitor for Network Statistics:
- Edit the network configuration template:
$sudo nano /etc/rpimonitor/template/network.conf
2. Adjust the configuration by uncommenting and commenting sections as detailed in the original instructions to tailor the displayed network statistics.

3. Restart RPi-Monitor to apply changes:
$sudo service rpimonitor restart
4. Update RPi-Monitor’s package status:
$sudo /etc/init.d/rpimonitor update
Access the RPi-Monitor web interface at http://<IPAddress>:8888 to view your server’s status and historical data, facilitating effective monitoring and troubleshooting.

Installing Netdata on Raspberry Pi (Recommended)
Netdata is a powerful tool designed to monitor and troubleshoot a variety of devices and the applications running on them, including Raspberry Pi and Pi-hole. With its quick installation process and no need for additional configuration, Netdata provides instant access to over 1,500 metrics, such as CPU load, memory and disk usage, and bandwidth, collected every second.
Installation process
Bare metal installation
To install Netdata on a Raspberry Pi, you only need to run a single command script that handles dependency installation and compiles Netdata from the source. On Raspberry Pis running Raspbian, the best way to install Netdata is our one-line kickstart script. This script asks you to install dependencies, then compiles Netdata from source via GitHub.
$wget -O /tmp/netdata-kickstart.sh https://get.netdata.cloud/kickstart.sh && sh /tmp/netdata-kickstart.sh --stable-channel --disable-telemetry
Parameters Explained
- –stable-channel: Use this to install from the stable release channel (default nightly).
- –disable-telemetry: Opt out of sending anonymous statistics.
- –no-updates: To disable automatic updates.
This command opts for a nightly version for the most updated features, disables anonymous statistics, and opts out of automatic updates.
During installation, the script will prompt for administrator credentials to install all necessary packages.
Container installation
We will install netdata inside a container using a docker-compose configuration following the instrucions from here: https://learn.netdata.cloud/docs/installing/docker. Below is the Docker Compose file to load in Portainer’s stacks menu:
version: '3'
services:
  netdata:
    image: netdata/netdata
    container_name: netdata
    environment:
      - TZ=Europe/Madrid # Change to your timezone
    pid: host
    network_mode: host
    ports:
      - 19999:19999
    restart: unless-stopped
    cap_add:
      - SYS_PTRACE
      - SYS_ADMIN
    security_opt:
      - apparmor:unconfined
    volumes:
      - netdataconfig:/etc/netdata
      - netdatalib:/var/lib/netdata
      - netdatacache:/var/cache/netdata
      - /etc/passwd:/host/etc/passwd:ro
      - /etc/group:/host/etc/group:ro
      - /etc/localtime:/etc/localtime:ro
      - /proc:/host/proc:ro
      - /sys:/host/sys:ro
      - /etc/os-release:/host/etc/os-release:ro
      - /var/log:/host/var/log:ro
      - /var/run/docker.sock:/var/run/docker.sock:ro
volumes:
  netdataconfig:
  netdatalib:
  netdatacache:
Key Components of the Configuration:
- Ports: The Netdata web interface is exposed on port 19999, which you can access via http://<your-raspberry-pi-ip>:19999.
- Volumes: Uses persistent storage for configuration, data libraries, and cache to ensure data persists across container restarts. Mounts proc and sys filesystems to allow Netdata to collect system metrics. Remeber, container volumen are mounted under /var/lib/docker/volumes host folder.
- Environment Variables: TZ is set for timezone configuration. Adjust it to match your local timezone.
- Capabilities and Security: Adds SYS_PTRACE and SYS_ADMIN to enhance metrics collection capabilities. Sets AppArmor to unconfined to avoid restrictions that could limit Netdata’s monitoring capabilities.
- Default Location of Docker Volumes: On a Linux system, the default location for Docker volumes is under /var/lib/docker/volumes/. So, if you have a named volume netdataconfig, the data stored in this volume can be found at: /var/lib/docker/volumes/netdataconfig/_data
Navigate to the Stacks menu and select “+ Add stack”. Enter a stack name in lowercase and choose the “Web editor” option. Paste the Docker Compose file provided earlier, modifying any necessary parameters. Next, click the “Deploy the stack” button and wait a few minutes.
Accessing Netdata
Navigate to http://[your raspberry pi IP]:19999 in your browser to view the Netdata dashboard. Upon first login, you’ll be prompted to create a cloud account to access additional features such as:
- Infrastructure-level dashboards.
- Centralized alert notifications.
- Custom dashboard editor.
- Assisted troubleshooting intelligence.


Through the dashboard, you can explore various metrics collected by Netdata, from device-specific data like CPU, memory, disk, network, and temperature (found under the Sensors section), to application-specific metrics for software like Fail2ban, firewall, Pi-hole, and WireGuard.
Configuring Netdata
Enabling temperature sensor monitoring
After installation, you’ll need to modify a configuration file to enable temperature sensor monitoring. This involves uncommenting the sensors=force line in the charts.d.conf configuration file. The location of this file varies depending on your operating system:
For container installation:
$sudo -s
#cd /var/lib/docker/volumes/netdata_netdataconfig/_data
$sudo ./edit-config charts.d.conf
For Debian:
$cd /etc/netdata
$sudo ./edit-config charts.d.conf
For Raspbian:
$cd /opt/netdata
$sudo cp usr/lib/netdata/conf.d/charts.d.conf etc/netdata/
$cd etc/netdata
$sudo ./edit-config charts.d.conf

A fter making the changes, restart the Netdata service to activate temperature sensor monitoring:
$sudo systemctl restart netdata
Increasing Historical Metrics Storage
Netdata recommends adjusting the data storage settings to accommodate more historical metrics. Utilize their database sizing calculator and guide on storing historical metrics your Raspberry Pi accordingly.
Cloud account and remote monitoring
Creating a cloud account provides a command to install an agent on your device for data collection and cloud transmission. Additionally, leveraging their mobile app is highly recommended for remote system monitoring.
Grafana Integration
For those interested in integrating with Grafana, detailed instructions on installing a Grafana agent on a raspberry pi are available on their website, providing step-by-step guidance for this process.
Enhancing the Raspberry security
In addition to the measures mentioned in the previous sections, such as enabling the firewall, installing fail2ban to protect against brute force attacks, securing SSH access, not using default ports, or disabling default users, we can take an additional step like disabling WiFi if we do not use it.
Disabling Wi-Fi
If your Raspberry Pi is equipped with a Wi-Fi interface that you do not use, disabling it can enhance security and reduce potential attack vectors. Here’s how to disable the onboard Wi-Fi:
Method 1: Disable Wi-Fi via /boot/config.txt
For Raspberry Pi 3 and Raspberry Pi 4, you can disable the onboard Wi-Fi directly through the firmware by modifying the /boot/config.txt file. This approach is recommended for a more permanent solution. Add the following lines to /boot/config.txt:
- For all models with onboard Wi-Fi:
dtoverlay=disable-wifi
- Specifically for Raspberry Pi 3 (this line is not needed for Pi 4 as the above line covers all models):
dtoverlay=pi3-disable-wifi
This method disables the Wi-Fi hardware at the firmware level, preventing it from being activated by the operating system.
Method 2: Blacklisting Wi-Fi Modules
Alternatively, you can disable the Wi-Fi by blacklisting the kernel modules responsible for the Wi-Fi interface. This method effectively prevents the Wi-Fi drivers from being loaded during system startup, which disables the Wi-Fi interface. Add the following lines to a new blacklist file within /etc/modprobe.d/:
Open or create the blacklist configuration file:
$sudo nano /etc/modprobe.d/raspi-blacklist.conf
Add these lines to the file to blacklist the Wi-Fi drivers:
blacklist brcmfmac
blacklist brcmutil
Save and exit the editor (in nano, press CTRL+X, then Y to confirm, and Enter to save).
After adding these lines, reboot your Raspberry Pi for the changes to take effect. This approach is useful if you might want to re-enable Wi-Fi in the future, as you can simply remove these lines or comment them out by prefixing with #.
Both methods are effective in disabling the Wi-Fi interface on a Raspberry Pi. Choose the method that best suits your needs based on whether you prefer a firmware-level solution or a reversible kernel module blacklist approach.
Backup amp; restore strategies for Raspberry Pi
Backing up your Raspberry Pi is crucial for ensuring that your data, configurations, and the entire system can be restored to a previous state in case of failure, corruption, or before making significant changes. Here are detailed methods for backing up your Raspberry Pi:
Method 1: Copy the SD Card Image
Creating a direct image of your SD card or USB drive is a straightforward way to backup your entire system. This method clones the entire partition, including the operating system, applications, user data, and settings.
To create an SD card image, use the dd command:
$sudo dd bs=4M if=/dev/sdb of=raspbian_bck.img conv=fdatasync status=progress
- bs=4M sets the block size to 4 megabytes to speed up the backup process.
- if=/dev/sdb specifies the input file (your SD card). Be sure to replace /dev/sdb with the correct device identifier for your SD card. Use the lsblk or fdisk -l command to identify your SD card.
- of=raspbian_bck.img defines the output file, the name of the disk image.
- conv=fdatasync ensures that the data is written and synchronized before the process completes.
- status=progress displays the progress of the backup as it happens.
Restoring from an SD card image:
To restore your Raspberry Pi from the backup image, use the dd command in reverse:
bash
sudo dd bs=4M if=raspbian_bck.img of=/dev/sdb conv=fdatasync status=progress
Ensure you specify the correct output file (of=/dev/sdb), which should be your SD card.
Method 2: Zip the Home Directory
This method involves compressing and backing up the home directory or any specific directories you wish to backup. This is useful for backing up user data and configurations without cloning the entire system.
Backup the home directory:
$sudo zip -r home_backup.zip /home/pi
- zip -r home_backup.zip creates a compressed zip file named home_backup.zip.
- /home/pi specifies the directory to backup. Adjust the path according to your needs or to backup other directories.
Restoring from the zip file:
To restore, simply unzip the backup file to the desired location:
$sudo unzip home_backup.zip -d /home/pi
Method 3: Scheduled Backups with rsync or cron
Scheduled backups can be set up using cron jobs and the rsync tool, allowing for incremental backups of specified directories to an external storage device or network location.
Setup a cron job for regular backups:
- Open the cron table for editing:
$sudo crontab -e
- Add a line to schedule your backup. For example, to backup daily at midnight:
cron
0 0 * * * /usr/bin/rsync -a /home/pi /path/to/backup/location
- /usr/bin/rsync -a /home/pi /path/to/backup/location specifies the rsync command to perform the backup. Replace /path/to/backup/location with your actual backup destination.
- Adjust the cron schedule syntax as needed for your backup frequency.
Bonus track. Setting up Vaultwarden: a lightweight password manager
When it comes to managing passwords securely, the choice of tools can greatly influence both the security and ease of use. Initially, I opted for keePass, a lightweight and open-source solution, and even shared my setup and usage tips on my blog. Over time, however, the landscape of password management tools has evolved, bringing more feature-rich options to the forefront, such as Bitwarden. Despite Bitwarden’s robust offerings, its official server can be resource-intensive, making it less ideal for all users.
This is where Vaultwarden comes into play. Vaultwarden is an alternative implementation of the Bitwarden server’s API, written in Rust. It’s designed to be compatible with Bitwarden clients but is significantly more lightweight, making it an excellent choice for self-hosting, especially on less powerful hardware like a Raspberry Pi.
Basic Installation of Vaultwarden
The installation process for Vaultwarden is straightforward and can be followed from the official documentation. Given my setup, where one Raspberry Pi is already dedicated to privacy filtering and serving as a VPN server, I opted to deploy Vaultwarden on a separate Raspberry Pi to avoid overloading a single device with multiple services.
Requirements for Accessing Vaultwarden
- Proxy Manager (Nginx): To access Vaultwarden securely, especially from outside your local network, you’ll need a reverse proxy. Nginx is a popular choice for this role, providing the necessary redirection and encryption for web traffic.
- Container Manager (Portainer): Vaultwarden and Nginx will run inside containers, simplifying deployment, isolation, and management of these services. Portainer is an intuitive container management tool that facilitates the management of Docker containers.
Ensuring Secure Remote Access
- DDNS Service: If you plan to access your Vaultwarden server from the internet, a Dynamic Domain Name System (DDNS) service is crucial. DDNS ensures that your server can be reached at a consistent address, even if your home IP address changes.
- Mandatory HTTPS: Given the sensitive nature of a password manager, ensuring secure access via HTTPS is non-negotiable. Accessing your password vault through an unencrypted HTTP connection is unsafe. The use of a reverse proxy like Nginx allows for the easy setup of SSL certificates, often through automated tools like Let’s Encrypt, to secure your connections.
Final Thoughts
Choosing Vaultwarden for self-hosted password management offers a balance between functionality and resource efficiency, making it an excellent choice for individuals looking to maintain control over their password data without requiring extensive server resources. The setup, while involving several steps, provides a robust and secure system for managing passwords across devices and from any location, ensuring your sensitive information remains protected.
By following these guidelines, you can establish a secure, private, and self-hosted password management solution that respects your resources and privacy.
Updating the software components on your Raspberry Pi, especially when using Docker containers, is crucial for security, performance improvements, and accessing new features. Here’s a streamlined guide on how to update key components like Portainer, individual Docker containers, and Nginx within your setup.
Updating Portainer
Portainer is an essential tool for managing your Docker environments. Follow these steps to update Portainer to the latest version:
- Stop the Portainer container:
$docker stop portainer
- Remove the existing Portainer container
$docker rm portainer
- Pull the latest Portainer image:
$docker pull portainer/portainer-ce:latest
- Run the new Portainer container:
$sudo docker run -d -p 9000:9000 --name=portainer --restart=always -v /var/run/docker.sock:/var/run/docker.sock -v portainer_data:/data portainer/portainer-ce:latest
Updating Vaultwarden
Containers should be regularly checked for updates to ensure you’re running the most secure and efficient versions.
Updating through Portainer:
- Stop the container: Navigate to Containers in Portainer, then stop the container you wish to update.
- Recreate the container: Select the container, then click on “Recreate”. Make sure to select “Pull latest image” before recreating.
- Restart the container: Once recreated, start the container. It will now run the latest image version.
Updating via Command Line:
To update a specific container, such as Vaultwarden, follow these steps:
- Pull the latest image:
$docker pull vaultwarden/server:latest
- Run the new container (example for Vaultwarden): Ensure to remove the previous container if necessary and adjust the volume mappings and port bindings as per your configuration.
$sudo docker run -d --name vaultwarden --restart=always -v /bw-data/:/data/ -p 127.0.0.1:8080:80 -p 127.0.0.1:3012:3012 vaultwarden/server:latest
Updating Nginx
For Nginx, which serves as a reverse proxy, it’s vital to keep both the application and its database containers up to date:
- Update the Nginx application container:
$sudo docker update --restart always nginx_app_1
- Update the Nginx database container:
$sudo docker update --restart always nginx_db_1
General tips for updating Docker containers:
- Backup first: Always backup your data before updating, especially for critical services like databases or personal data management systems.
- Use tags wisely: When pulling new images, consider using specific version tags instead of always using :latest to ensure compatibility.
- Clean Up: After updating, clean up old images and containers with docker system prune to free up space.
Bibliography
Base
- https://www.forbes.com/sites/marketshare/2012/03/05/if-youre-not-paying-for-it-you-become-the-product/
- https://medium.com/change-your-mind/if-you-are-not-paying-for-the-product-you-are-the-product-4dbc15b9a3f2
- https://clearcode.cc/blog/what-is-data-broker/
- https://www.peekyou.com/
- https://www.toptenreviews.com/best-people-search-services
- https://thesmashy.medium.com/building-a-pihole-for-privacy-and-performance-f762dbcb66e5
- https://www.thetechherald.com/tech-news/raspberry-pi-raspbian-os-gets-a-microsoft-repo-without-any-notification-heres-how-to-remove-concerns-of-telemetry-data-collection/
- https://arstechnica.com/gadgets/2021/02/raspberry-pi-os-added-a-microsoft-repo-no-its-not-an-evil-secret/
- https://betanews.com/2021/02/08/linux-based-raspberry-pi-os-secret-microsoft-repo/
- https://www.raspberrypi.org/documentation/hardware/raspberrypi/bootmodes/msd.md
Pi-hole
https://dev.to/jldohmann/the-ultimate-ad-blocker-configuring-pi-hole-with-unbound-dns-20eo
https://www.bentasker.co.uk/blog/the-internet/703-scaling-pihole-to-cope-with-huge-query-rates
https://www.vcloudinfo.com/2019/02/my-pi-hole-is-out-of-space-how-to-free-up-space-to-upgrade.html
https://github.com/topics/pihole-ads-list
https://blog.mandos.io/p/ultimate-guide-setup-raspberry-pi-hole-boost-privacy-browsing-speed
https://avoidthehack.com/best-pihole-blocklists
Unbound
https://docs.pi-hole.net/guides/dns/unbound/
https://github.com/pi-hole/docs/issues/207
https://www.reddit.com/r/pihole/comments/d9j1z6/unbound_as_recursive_dns_server_slow_performance/
Fail2ban
https://www.niih.de/how-to-upgrade-fail2ban-to-support-ipv6/
Unattended-Upgrades
https://pimylifeup.com/unattended-upgrades-debian-ubuntu/
https://www.zealfortechnology.com/2018/08/configure-unattended-upgrades-on-raspberry-pi.html
https://wiki.debian.org/UnattendedUpgrades
https://linux-audit.com/upgrading-external-packages-with-unattended-upgrade/
https://pimylifeup.com/unattended-upgrades-debian-ubuntu/
Pi.Alert
https://github.com/pucherot/Pi.Alert
https://github.com/jokob-sk/Pi.Alert
https://github.com/leiweibau/Pi.Alert
Container
https://docs.docker.com/engine/install/debian/
https://www.youtube.com/watch?v=XziNCmcxB_c
WireGuard
https://wireguard.how/server/debian/
https://engineerworkshop.com/blog/how-to-set-up-wireguard-on-a-raspberry-pi/
https://www.cyberciti.biz/faq/debian-10-set-up-wireguard-vpn-server/
https://serversideup.net/generating-wireguard-qr-codes-for-fast-mobile-deployments/
https://serversideup.net/courses/gain-flexibility-and-increase-privacy-with-wireguard-vpn/
https://www.procustodibus.com/blog/2020/12/wireguard-site-to-site-config/
https://wiki.debian.org/SimplePrivateTunnelVPNWithWireGuard
https://kirelos.com/set-up-your-own-wireguard-vpn-server-on-debian/
Monitoring tools
https://github.com/XavierBerger/RPi-Monitor
https://learn.netdata.cloud/guides/monitor/pi-hole-raspberry-pi
https://grafana.com/tutorials/install-grafana-on-raspberry-pi/
Backup
https://raspberryexpert.com/how-to-backup-raspberry-pi/
Vaultwarden
https://www.wundertech.net/how-to-self-host-bitwarden-on-a-raspberry-pi/
https://medium.com/codex/complete-self-hosted-bitwarden-for-raspberry-pi-24b59c3b02df
https://pimylifeup.com/raspberry-pi-bitwarden/
https://phoenixnap.com/kb/update-docker-image-container
https://www.wundertech.net/how-to-update-a-docker-container-using-portainer/
https://github.com/NginxProxyManager/nginx-proxy-manager
Others
https://serverfault.com/questions/1006595/cannot-setup-wireguard-vpn
https://wireguard.how/server/debian/
https://raspberrytips.com/disable-wifi-raspberry-pi/
https://www.raspberrypi.org/forums/viewtopic.php?t=290611
https://www.raspberrypi.org/forums/viewtopic.php?f=63&t=138610
https://www.simonpreston.dev/2019/03/01/using-the-raspberry-pi-as-a-dhcp-server/
https://www.privacyguides.org/
 Muchas veces se bromea con que la energía de fusión comercial siempre está a cincuenta años vista; aunque los más optimistas prefieren decir que siempre está a veinte años vista. Así se decía hace cincuenta años, y hace veinte años, y se sigue diciendo hoy. De hecho, mi propia estimación es que la ruta hacia la energía fusión con ITER+IFMIF+DEMO+PROTO acabará con los primeros reactores comerciales (si todo va bien) alrededor de 2070 (que está a unos cincuenta años vista). ¿Cuál es la razón? «Es la economía, estúpido» (the economy, stupid, la famosa frase de la campaña electoral de Bill Clinton en 1992). La investigación, el desarrollo y la innovación en energía de fusión siempre han estado infrafinanciados. Y no solo lo saben y lo afirman los científicos, también los políticos. Pero una cosa es saberlo y otra muy diferente poner un arreglo. Mientras el motor de la política sean los resultados a cuatro o cinco años vista, la energía de fusión nunca será alcanzada. Nunca. Si de verdad queremos que la energía de fusión revolucione nuestro mundo tenemos que apostar de forma rotunda por una vía rápida hacia la fusión.